Size and brightness come first: a small panel works for vlogging and video calls, while product and interview work needs more output and softer diffusion. Color accuracy matters as much as power, because a light that skews green or magenta is hard to fix in editing. Power source is the third decision: built in batteries keep your rig simple, and removable batteries let you shoot all day.
The Light You Can Actually Mount
Most on camera lights sit in the camera hot shoe or screw onto a small tripod. Check the mount before you buy: a cold shoe foot with a 1/4 to 20 thread underneath works on cameras and light stands, while a plain hot shoe foot limits you to the camera.
Weight changes how the camera feels in your hand. A panel under 200 grams is easy to forget, but anything over 400 grams starts to make a handheld rig front heavy. Check the listed weight and compare it to your camera body.
The angle of the light matters more than the mount. A light that only points straight ahead will bounce off glasses and overexpose foreheads. Look for a ball head or tilt bracket that lets you aim the light down or to the side.
- Cold shoe foot with 1/4 to 20 thread works on more supports.
- Under 200 grams feels light; over 400 grams pulls the camera down.
- A tilt or ball head lets you avoid glare and hot spots.
Color Accuracy Is the Quiet Spec
Two lights can look equally bright but render skin completely differently. The spec that matters is CRI, or Color Rendering Index. A CRI of 90 or above is the baseline for anything with a face in the frame. Below 90, skin can look gray, green, or just wrong.
TLCI is a newer score designed for video sensors rather than the human eye. A TLCI of 90 or above means the light should look natural on camera, not just to a person standing in the room. Check for both numbers when a listing provides them.
Cheap lights often skip the CRI rating entirely. That is usually a sign the manufacturer does not want you to compare it. A light with no CRI listed can still be fine for a webcam background, but it is a gamble for beauty or interview work.
Batteries Decide If You Finish the Shot
A light with a built in battery is easy: charge it over USB-C and go. The drawback is that when it dies, you stop shooting. Built in batteries also lose capacity over time, and the whole light becomes less useful as the battery ages.
Removable batteries, usually Sony NP F style, cost more up front but let you carry spares. You can swap a dead battery in seconds and keep rolling. This matters most for interviews, event work, or any shoot longer than an hour.
Check the listed runtime at full power, not the marketing number at minimum brightness. A light that runs 2 hours at 100% is very different from one that runs 10 hours at 5%. Also check whether the light can run while plugged into USB power, because that saves batteries for static setups.
Soft Light Needs Distance or Diffusion
A bare LED panel is a small, hard light source. Up close it creates sharp shadows and shiny hot spots on skin. That can work for a gritty look, but it is rarely flattering for interviews or beauty content.
The cheapest fix is distance: move the light farther away and the shadows soften slightly, but you also lose brightness. A clip on diffuser or a small softbox attachment spreads the light over a larger area, which softens it more effectively.
Some panels have built in diffusion or a snap on white filter. Others accept standard softbox mounts. If you plan to shoot faces, choose a light that can take a diffuser rather than one with only a bare panel.
The size of the light source matters more than the diffuser material. A 4 inch panel with diffusion is still a small source. A 6 inch panel with a softbox is noticeably softer. For beauty work, a larger panel or a separate softbox light is the better tool.
Bi Color Versus Daylight Only
A daylight only light is balanced for outdoor or window light, around 5600K. It is simpler, often brighter per dollar, and fine if you always shoot in daylight or with other daylight lights.
A bi color light lets you dial from warm tungsten, around 3200K, to cool daylight, around 6500K. That matters when you need to match lamps, ceiling lights, or mixed room lighting. Mixing a daylight only light with warm room bulbs creates an orange blue clash that is hard to fix.
The tradeoff is output: a bi color light often loses brightness at the extremes because it blends two sets of LEDs. If you only shoot in one color temperature, a daylight only panel gives you more light for the same money.
For video calls and home studio use, bi color is worth the extra cost because room lighting varies. For outdoor vlogging or product shots under controlled lights, daylight only is often enough.
Comparing the Main Panel Styles
The on camera light category splits into a few recognizable designs. Each one favors a different kind of shooter.
The table below groups them by brightness and flexibility rather than by brand or price tier.
| Panel style | Typical brightness | Color control | Best for |
|---|---|---|---|
| Pocket LED panel | Low | Daylight only | Webcam calls, quick vlogs |
| On camera panel | Medium | Daylight or bi color | Interviews, run and gun |
| High output panel | High | Bi color | Product and beauty work |
| RGB panel | Medium | Full color | Creative effects, music videos |
RGB panels add color effects but rarely improve skin tones. They cost more and often have lower CRI on white light. Skip RGB unless you specifically want colored backgrounds or accent lighting.
Brightness is measured in lux at a distance, but listings use different distances, which makes direct comparison tricky. A light rated at 1000 lux at 1 meter is meaningfully brighter than one rated at 1000 lux at 0.5 meters. Check the distance in the fine print.
The Mistake of Buying for the Wrong Distance
An on camera light is designed for subjects within a few feet of the lens. Push it beyond that and the light falls off fast. This is the physics of inverse square falloff: double the distance, quarter the light.
For a seated interview two feet away, a small panel is fine. For a full body shot six feet away, you need a much larger or more powerful light, or you need to move the light off camera and closer to the subject.
Buying a light for a room instead of a face is a common mistake. If your goal is to brighten a whole home office for video calls, an on camera light will only brighten your face and leave the background dark. A larger key light or a room light is the right tool.
Check the beam angle in the listing. A narrow beam, around 30 to 45 degrees, concentrates light on a face but leaves the background dark. A wide beam, 60 degrees or more, spreads light more evenly but looks dimmer at the same distance.
When to Skip an On Camera Light
If you shoot mostly outdoors in daylight, an on camera light adds little. The sun is already brighter than any small panel, and the light will only drain your battery.
If you need soft, flattering light for seated interviews or beauty content, a larger off camera softbox or umbrella gives better results for the same money. An on camera light is a compromise for mobility, not a replacement for a key light.
If you shoot wide shots or full body scenes, the light will be too small and too close to the lens. It will create a flat, shadowless look with a bright face and dark background.
A hot shoe flash or a studio strobe is a better tool when you need to freeze motion or overpower sunlight. The related guide on flash versus strobe lighting explains that decision in more depth.
Reading a Listing Before You Buy
Start with the CRI and TLCI numbers. If they are missing, ask the seller for them or move on. Brightness in lux is useful only when the distance is specified.
Check the battery type and whether it is included. Some lights ship without batteries, and the cost of two NP F batteries and a charger can match the price of the light itself.
Look for the mounting hardware in the box. A light that includes a cold shoe adapter, a diffuser, and a mini tripod saves you from buying those separately.
Ask the seller about the beam angle and the runtime at full power if the listing does not say. Those two numbers tell you more about real world use than the marketing brightness claim.
Long Term Costs Nobody Mentions
The light itself is often the cheapest part. Diffusion, a spare battery, a charger, and a small stand or clamp can double your spend.
Built in batteries degrade over two to three years of regular use. A light that once ran two hours may run half that. Removable batteries are cheaper to replace than an entire light.
Plastic mounts and tilt brackets are the first parts to break. A metal cold shoe foot and a locking tilt mechanism cost a little more but survive being knocked around in a bag.
For product photography, the light is only part of the setup. You may also need a macro lens for close up product shots if your current lens cannot focus near enough.
On Camera Light Questions Buyers Ask First
How many lumens do I need for an on camera video light?
Lumens are less useful than lux at a distance, but as a rough guide, 500 to 1000 lumens works for close up vlogging and video calls. For interviews or product work at two to three feet, look for 1500 lumens or more. The beam angle matters just as much: a narrow beam can look bright on a face but leave everything else dark.
Is a higher CRI always better?
Yes, up to a point. CRI measures how accurately a light renders colors compared to natural light. A CRI of 95 is better than 90, but the difference is small above 95. More important is that the light also has a high TLCI score, because TLCI is designed for video sensors. A light with CRI 95 but poor TLCI can still look off on camera.
What is the difference between bi color and RGB?
Bi color lights adjust between warm tungsten and cool daylight, which helps you match existing room lighting. RGB lights can produce any color, including green, blue, or purple, for creative effects. RGB panels usually cost more and often have slightly worse white light quality, so choose RGB only if you want colored accents.
Can I use an on camera light for product photography?
Yes, for small products and close up shots. A single on camera light works if you diffuse it and combine it with window light or a second light. For larger products or full scene shots, you need more power and softer sources than a small panel can provide.
Which is better, built in or removable batteries?
Built in batteries are simpler and cheaper, good for short video calls and occasional vlogging. Removable batteries, usually NP F style, let you swap in a spare and keep shooting, which matters for interviews and events. Removable batteries also extend the life of the light, since you can replace them when they wear out.
The Right On Camera Light for Your Setup
A vlogger who shoots at arm's length and moves between rooms should get a compact bi color panel with a built in battery and a diffuser. It matches any room lighting and never needs a spare battery. For a product photographer who works at a desk, a high output panel with removable NP F batteries and a softbox attachment is the better call, because it gives softer light and runs all day.
Real on camera video light listings, so you can check the points in this guide against actual products. These are affiliate links: as an Amazon Associate we earn from qualifying purchases, at no extra cost to you.
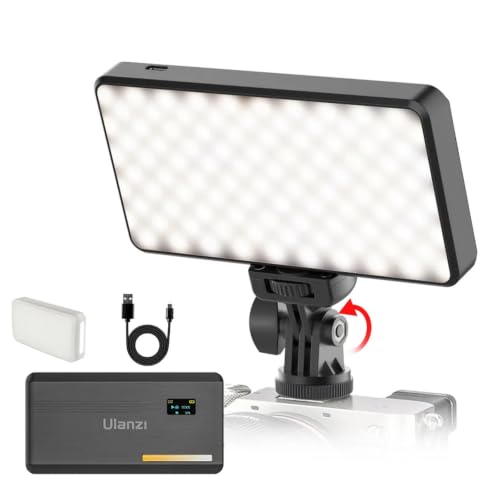 VIJIM Ulanzi VL200 Bi-Color LED Video Light On-Camera,5000mAh 2500-9000K CRI≥95 |…
View on Amazon ↗
 GODOX Godox C30Bi Bi-Color On Camera Video Light, Pocket LED Video…
View on Amazon ↗
 SMALLRIG SmallRig RM120 RGB LED Video Light Panel, 7W Portable Metal…
View on Amazon ↗
Listing names and images come from Amazon and are rechecked against the live listings; last checked Nov 8, 2026. No prices shown; the current price is on the listing.
How to read this guide. This guide is written from general knowledge of how on camera video lights work, not from individual product documents or tests. It cannot tell you whether a specific listing is accurate, so check the CRI, battery type, and lux distance on the product page before you buy.