Two factors decide most seed tray purchases: cell depth for root growth and drainage for moisture control. Beginners in dry climates need deeper cells and a humidity dome. Balcony gardeners with limited shelf space should choose compact trays with a bottom tray and clear lid. The main tradeoff is durability against price: flimsy plastic warps after one season, while sturdier trays cost more upfront but survive several planting cycles.
Cell Depth Decides Root Health
Roots need vertical room before transplant. A cell under 2 inches deep forces seedlings to circle or stall. Look for trays with cells at least 2 to 3 inches deep for leafy greens and flowers. Tomatoes, peppers and other long season vegetables want 3 to 4 inches to develop a solid root ball.
Shallow cells dry out faster because the soil volume is small. This matters most in dry climates or on a sunny balcony where evaporation is high. A deeper cell holds moisture longer between waterings. Check the listing for cell depth in inches or milliliters of soil volume. If the seller does not state it, ask before buying.
Cell shape also affects root release. Tapered square or round cells let a root plug slide out cleanly. Straight sided cells can trap roots against the walls. Compare the cell profile in product photos. A slight inward taper from top to bottom is the design to look for.
Drainage Is a Non Negotiable
Every cell needs a hole at the bottom. Without one, water pools and seedlings develop damping off, a fungal disease that kills stems at the soil line. Check that each cell has an open hole, not just a thin slit that clogs with soil. Some trays have a hole pattern that lets roots air prune, which stops circling.
A bottom tray catches runoff and protects your shelf or windowsill. It also lets you water from below by pouring water into the tray and letting the soil wick it up. Bottom watering strengthens roots and keeps the soil surface dry, which reduces fungus gnats. Make sure the bottom tray is deep enough to hold water without overflowing.
For dry climates, a clear humidity dome slows evaporation and keeps the top layer of soil moist during germination. Remove the dome once most seeds sprout to prevent mold. Check that the dome has adjustable vents. A sealed dome with no vents traps too much humidity and can cook seedlings on a warm balcony.
Tray Material Sets the Reuse Clock
Thin flexible plastic is cheap but warps after one season in sun. It often cracks when you try to pop out a root plug. Thick rigid plastic holds its shape and can be washed and reused for several years. Silicone or rubber trays cost more but release plugs with a gentle push and resist cracking in cold or heat.
For a beginner gardener, a mid weight plastic tray with a bottom tray and dome is a sensible start. You learn your watering rhythm without overspending. If you grow seedlings every spring, choose rigid plastic or silicone. The higher price spreads across many sowings.
Check whether the material is UV stabilized if you plan to keep trays on a sunny balcony. Untreated plastic becomes brittle after a summer of direct sun. Store trays out of sunlight when not in use to extend their life, regardless of material.
Match the Tray to Your Growing Space
Balcony gardeners often work with a narrow shelf or a small table. Measure the space before buying. A standard 1020 tray is about 10 by 20 inches, but many starter kits are smaller. Compact 12 cell or 24 cell trays fit a windowsill or a balcony railing planter better than a full flat.
Small backyard growers have more room but still benefit from a tray that fits a standard heating mat. If you plan to use a seedling heat mat, choose a tray with a flat bottom that makes full contact. Gaps under the cells slow warming and cause uneven germination.
Vegetable growers who start many seeds at once may prefer a tray with interchangeable cell inserts. You can swap a 72 cell insert for a 32 cell insert as seedlings grow. This flexibility costs more but reduces the number of trays you need to store.
Which Features Are Real and Which Are Hype
Some listings highlight a self watering system. This usually means a capillary mat or a wicking cord under the cells. It helps in dry climates or if you travel for a few days, but it does not replace checking soil moisture. A simple bottom tray and consistent attention work just as well for most home gardeners.
Biodegradable cells made from peat, coir or paper sound appealing but dry out faster than plastic. They also wick moisture away from the soil if left exposed to air. Use them only if you want to plant the whole plug without disturbing roots, and keep them inside a solid outer tray.
Labels like 'BPA free' matter little for seedlings because the plants do not absorb the plastic in meaningful amounts. Focus instead on cell depth, hole size and material thickness. A clear dome with vents is a real advantage. A flimsy dome that fogs and cracks is not.
Some kits include a grow light or a heat mat. These are useful only if your space lacks bright light or stays cool. A sunny south facing window can replace a grow light. A warm room above 65 degrees Fahrenheit often makes a heat mat unnecessary for common vegetables.
Beginner Mistakes That Kill Seedlings
Overwatering is the most common failure. A tray with poor drainage keeps soil soggy and seedlings collapse. Water only when the soil surface looks dry, or water from below until the top glistens. Stop before the tray sits in standing water for more than 30 minutes.
Starting seeds too early leads to leggy, weak plants. Check the seed packet for the right number of weeks before your last frost date. A tray that sits on a dim shelf produces stretched stems that break at transplant. Move trays to the brightest spot you have or add a small grow light.
Leaving the humidity dome on too long creates a fungal nursery. Remove the dome as soon as the first green shoots appear. If you see white fuzz on the soil, scrape it off and increase airflow. A small fan on low can strengthen stems and dry the surface.
Using garden soil instead of a seed starting mix is another common error. Garden soil compacts in small cells and may carry pathogens. A light, fluffy mix of peat or coir and perlite drains well and lets roots push through. Check the bag for the words 'seed starting' rather than 'potting soil'.
Comparing Tray Types for Your Setup
| Tray type | Cell depth | Drainage style | Best for | Reuse |
|---|---|---|---|---|
| Thin plastic flat | 1.5 to 2 in | Small holes | One season, tight budget | Low |
| Standard nursery tray | 2 to 3 in | Open holes | Beginners, leafy greens | Medium |
| Deep cell insert tray | 3 to 4 in | Air pruning slits | Tomatoes, peppers | High |
| Silicone plug tray | 2 to 3 in | Open holes | Frequent growers | Very high |
A thin flat works if you only start a few seeds once. A deep cell insert tray is worth the extra cost when you grow long season vegetables every year. Silicone plug trays make transplanting fastest but are the most expensive option.
Long Term Costs and Care
A seed tray is not a one time purchase if you reuse it. Wash trays with warm soapy water after each use and rinse well. Soak them in a mild bleach solution, one part bleach to nine parts water, for 10 minutes to kill pathogens. Rinse thoroughly and let them dry in the sun.
Replace thin trays every season, which adds up over five years. A rigid plastic or silicone tray that lasts five seasons costs less per sowing than a cheap tray replaced each spring. Factor in the cost of a seed starting mix and a bottom tray when comparing prices.
Some trays need replacement domes or cell inserts, which may be sold separately. Check whether the manufacturer offers spare parts before you commit. A tray with a proprietary insert size can become useless if the insert cracks and no replacement is available.
When to Skip a Seed Tray Altogether
If you only grow a few herbs or flowers, small pots or recycled yogurt cups with drainage holes work just as well. A full tray takes up shelf space and needs a bottom tray and dome to work properly. For a single windowsill pot, a tray is overkill.
Gardeners who sow directly into the ground do not need a starter tray for most crops. Root vegetables like carrots and radishes grow poorly when transplanted. Check the seed packet. If it says 'direct sow', skip the tray.
A small backyard with a short growing season may benefit from a cold frame or a mini greenhouse instead of a tray. These protect seedlings outdoors without the need for transplanting. Compare the cost of a tray plus grow light against a simple cold frame if you lack indoor space.
Seed Tray Questions Before You Buy
How deep should a seed starter tray be?
Aim for cells 2 to 3 inches deep for most vegetables and flowers. Tomatoes, peppers and other long season plants prefer 3 to 4 inches. Deeper cells hold more soil and moisture, which matters in dry climates or on a sunny balcony.
What is the best material for a seed starter tray?
Thick rigid plastic balances cost and durability for most home gardeners. Silicone or rubber trays release plugs more easily and last longest. Thin flexible plastic is fine for one season but cracks quickly. Avoid trays that feel flimsy in photos or product videos.
Can I reuse a seed starter tray?
Yes, if you wash it after each use and disinfect it with a mild bleach solution. Thick plastic and silicone trays withstand many washes. Thin plastic often warps or cracks after one or two seasons. Store trays out of direct sun to slow UV damage.
Is a humidity dome necessary for seed starting?
Not always, but it helps in dry climates or when indoor air is very dry. A dome keeps the soil surface moist until seeds germinate. Remove it once sprouts appear to prevent mold and weak stems. Choose a dome with adjustable vents.
Which seed starter tray is best for a small balcony?
A compact 12 or 24 cell tray with a bottom tray and a clear dome fits a narrow balcony shelf. Measure your space first. A standard 10 by 20 inch flat may be too wide. Look for a tray with a flat bottom if you plan to use a heat mat.
Which Seed Tray Fits Your Growing Style
A gardener starting tomatoes, peppers and herbs on a sunny balcony or in a small backyard should pick a deep cell insert tray with 3 to 4 inch cells, open drainage holes and a rigid plastic construction. Add a clear dome with vents if the air is dry. That setup supports strong roots and survives several seasons. A different situation calls for a different tray: someone starting only a few lettuce or flower seeds on a windowsill can skip the big tray and use small pots or a compact 12 cell tray with a bottom tray. The deep cell tray is wasted space and money for a handful of plants.
Real seed starter tray listings, so you can check the points in this guide against actual products. These are affiliate links: as an Amazon Associate we earn from qualifying purchases, at no extra cost to you.
 ROOTRIMMER RooTrimmer 10 Pack 32 Cell Seed Starter Trays - Extra…
View on Amazon ↗
 AAAMERCANTILE AAAmercantile Seed Starter Trays 300 DEEP Extra Large Cells Total…
View on Amazon ↗
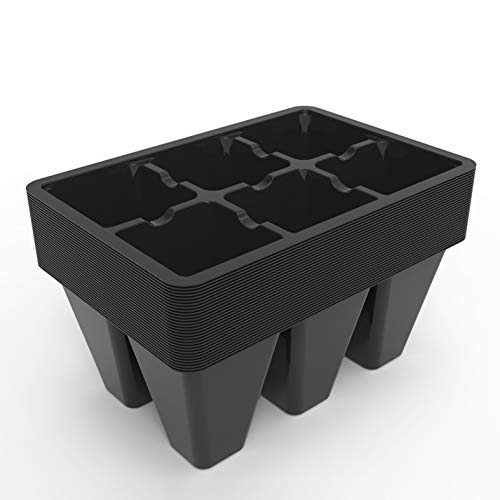 GARDZEN Gardzen 30 Pack 6-Cell Seed Starting Tray for Seedlings, Plant…
View on Amazon ↗
Listing names and images come from Amazon and are rechecked against the live listings; last checked Nov 8, 2026. No prices shown; the current price is on the listing.
How to read this guide. Use this guide as a checklist to hold against any seed starter tray listing. It describes the product category from general knowledge, not a verdict on any individual model, so verify cell depth and hole size on the product page before you buy.